Chiffon: Eggs
4
Ingredients:
– Banana: to taste – Biscuit: to taste – Sugar pearls: to taste – Coconut flakes: to taste – Nestle whipping cream: 250ML – Fine sugar: 20 grams Instructions: 1. Separate the egg white and yolk. Add a few drops of lemon juice to the egg white, then gradually add 60 grams of fine sugar in three batches, whipping until stiff peaks form. 2. Add 30 grams of fine sugar to the egg yolk and mix well. Then, incorporate corn oil and milk, stirring until combined. Sift in low-gluten flour and gently fold using an up-and-down motion until a smooth yolk batter is achieved.3. Take one-third of the meringue and fold it into the egg yolk batter.
4. Gently fold the mixture using an up-and-down motion until evenly combined. 5. Pour the mixed egg yolk batter back into the remaining meringue and fold until a smooth cake batter forms. 6. Pour the cake batter into the mold, level the surface slightly, then lift and tap the mold twice to remove large air bubbles. Place it in the preheated oven at 180°C for 45 minutes. (Cover with foil after the surface browns.) 7. Once baked, remove the cake and invert it onto a wire rack to cool completely before proceeding. 8. Prepare the fruit toppings: strawberries and bananas. 9. Prepare the additional toppings: almonds, biscuits, and shredded coconut. 10. Chill the whipping cream in the refrigerator for 12 hours beforehand. Pour it into a clean, oil-free, and water-free container, add 20g of granulated sugar. (Place the container over a larger bowl filled with ice water.)11. Whip until stiff peaks form and set aside.
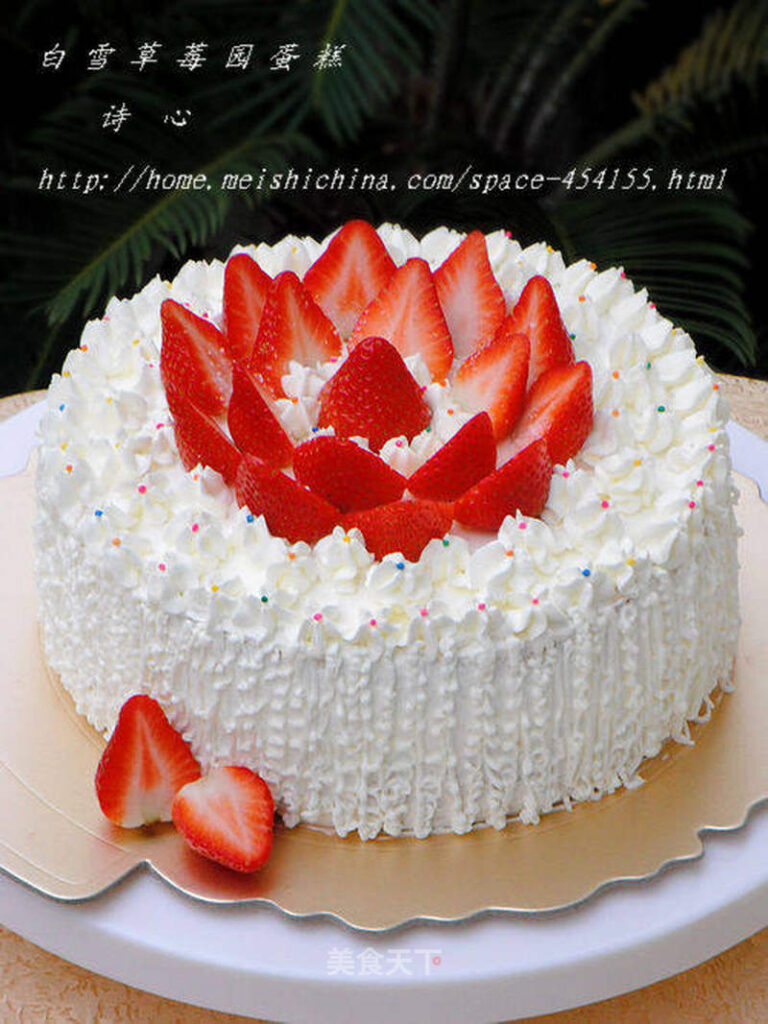
12. Slice the cake in half horizontally. 13. Take one cake layer, place it on a cake board, and spread a layer of cream evenly. 14. Top with an appropriate amount of crushed strawberries, bananas, almonds, and biscuits. (Crushed almonds add a particularly delicious taste in the filling.) 15. Continue by spreading another layer of cream to cover the filling. 16. Place the other half of the cake on top. (Note: Cream was applied here before remembering the step had not been photographed.) 17. Frost the edges and surface of the cake smoothly with cream. 18. Transfer a portion of the cream into a piping bag and pipe your preferred flower designs along the edge of the cake surface. 19. Estimate the area intended for strawberries, pipe small flowers in the remaining blank spaces, and finally place the strawberries to complete the decoration.20. As the edges are difficult to smooth evenly and no floral piping is planned, to enhance the aesthetic appeal, I reserved some cream in a separate piping bag and snipped a very small opening. (A tiny opening is sufficient.)
21. Using a consistent technique, randomly pull fine strands along the edges to create an elegant and visually pleasing finish. 22. Finally, with a small amount of cream remaining to avoid waste, I dotted it around the strawberries in the center. The cake was then finished with a sprinkle of sugar pearls. This simple yet sophisticated piped cake is now complete.