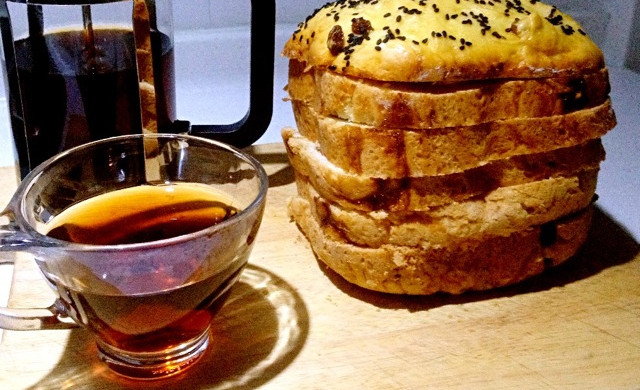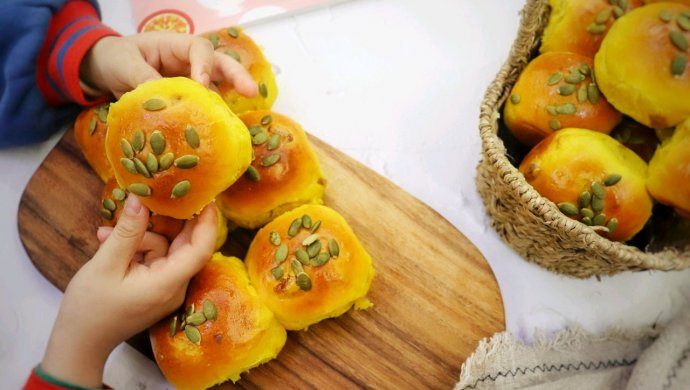
Ingredients for Pumpkin Raisin Mini Bread: Main dough ingredients: High-gluten flour 320g, Low-gluten flour 80g, Granulated sugar 60g, Whole egg liquid 40g, Milk powder 15g, Pumpkin puree (It is essential to reserve some pumpkin puree beforehand, as the moisture content varies. The tip at the beginning of the recipe mentions this) 300g, Yeast 4g, Salt 5g, Butter 40g. Surface decoration: Egg liquid as needed, Pumpkin seeds as needed.
Method for making Pumpkin Raisin Mini Bread:
I place the dough in a proofing cabinet, setting the temperature to 26 degrees Celsius and humidity to 70%. Step 5: Allow the dough to rise to approximately double its size; when you poke a hole with a flour-dusted finger, it should not collapse or shrink, indicating that fermentation is complete. A very slight and slow retraction at the bottom is acceptable; do not let it retract completely. There is no set time for fermentation, it depends on the condition of the dough.
Step 6: After the first rise, gently press and knead the dough to release air. Divide the dough evenly into 16 portions, round them, cover with plastic wrap, and let them relax for 25 minutes. Step 7: After relaxation, take a piece of dough, roll it into a circle, and fold it using both hands with the help of your thumb and index finger to shape it. I have shared this technique before! Alternatively, you can press and release the air from the dough after relaxation, then fold it in the direction of smoothness with the help of your thumb and index finger to shape it. Arrange all the shaped dough side by side on a baking tray for the final fermentation. Step 8: For the second rise, place the dough in a warm and humid environment with a temperature of 35-38 degrees Celsius and humidity of 75%-85%. If you have a proofing cabinet, use it; if not, you can use an oven. Turn on the oven’s fermentation function, set the temperature to 35 degrees Celsius. If your oven does not have humidity control, place a bowl of warm water to regulate humidity. Set the timer for 35 minutes, but observe the dough’s condition during fermentation as there is no fixed time. The dough should rise to about double its size with a smooth surface, and it should slowly bounce back when gently pressed with a finger. Step 9: After fermentation, remove the dough and preheat your oven to 190 degrees Celsius. Brush the surface of the well-fermented dough with egg wash and sprinkle with pumpkin seeds. Note that this egg wash is separate from the 40 grams in the main dough recipe; it’s an additional egg. Step 10: Place the dough in a fully preheated oven and bake at an upper heat of 160 degrees Celsius and a lower heat of 180 degrees Celsius for 20 minutes. This temperature and time work well for my oven; adjust according to your oven’s temperature, or cover the surface with aluminum foil if needed. I used a 28cm gold pan from San Neng, in Chinese red. Adjust the time and temperature according to your oven’s specifications. Step 11: After baking, remove the bread from the mold and place it on a cooling rack to cool down. When it’s slightly warm, seal it in a bag for storage. Step 12: The bread is very soft, without the addition of water or milk; just control the dough mixing and fermentation well. Step 13: The little rascal can’t wait to dig in~ Step 14: The color is very healing. It’s like seeing a harvest~~ Step 15: Why not try one? The cooking technique for pumpkin raisin bread: The amount of pumpkin puree, 300 grams, is not very precise. Because different pumpkins will have varying textures when steamed or baked, if the pumpkin puree is too dry or thick, you will need more of it; if it’s too soft or wet, you will need less.In the recipe, you can start by adding around 250 grams out of 300 grams, then adjust the amount based on the dough’s condition. Apart from the pumpkin puree, different brands of flour have varying water absorption rates, and temperature and humidity can also differ, making it necessary to reserve some. Many people ask: I followed the recipe exactly, why is my dough too wet? Why is it too dry? Why.
.. Why… When making bread, it’s crucial to flexibly control the liquid content in the recipe because the water absorption of flour varies, and the climate, temperature, and humidity differ between the north and south. Always adjust according to the dough’s condition, which is a frequently discussed topic! Adjust the time and temperature according to the actual conditions of your oven, as there are significant differences between large and small ovens, and even between two identical ovens of the same brand. Cooking delicious dishes requires skills, and each of my dishes has its own little tricks. You can search for ‘bread’ to directly view my recipes!